How to Design a Media Wall with AI from Any Photo
19 July 2026 · 10 min read
Designing a media wall used to mean hiring a designer, collecting samples, and trying to imagine how a finished wall would look in your room. Today, AI makes it far simpler. You can upload a photo of your living room, choose a direction, and generate a bespoke media wall concept in minutes.
At Aspire Interiors, our AI media wall design tool reads your room, understands your brief, and creates a visual concept that fits your space. Whether you are working from a phone photo, an estate agent image, or a picture of a room you love, the process is the same. You can design a media wall from a photo, refine it with natural language prompts, and end up with a concept that feels like it was made for your home.
This guide walks you through exactly how to design a media wall with AI from any photo using the Aspire Interiors app. Each step is illustrated with a real screenshot from the design process, so you know exactly what to expect before you begin.
↓Design your media wall from a photoCan You Really Design a Media Wall from a Photo?
Yes. The Aspire Interiors app uses AI to analyse a photo of your room and generate a media wall design that respects your space, proportions, and existing features. You can use a photo of your actual living room, or you can upload an inspiration image from somewhere else and ask the AI to adapt it to your home. For the extreme version of this — turning literally any image (a pet, a cartoon, an object) into a media wall — see how we turn any photo into a media wall design with AI.
The key advantage is visual accuracy. Instead of guessing whether a style will work, you see it. The AI can suggest materials, layouts, colours, and lighting based on your brief, and you can refine every detail until it feels right. It is free to start, and the results are generated in real time.
This approach also removes a lot of the friction from traditional design. You do not need to measure the room, draw plans, or collect dozens of samples. The AI uses the photo to understand the context and generate a concept that fits. If you want to design a media wall from a photo without the usual back-and-forth, AI is the most direct route available.
Step-by-Step: How to Design a Media Wall from a Photo
Follow the seven steps below. Each step is shown with a real screenshot from the Aspire Interiors app.
Jump to a step
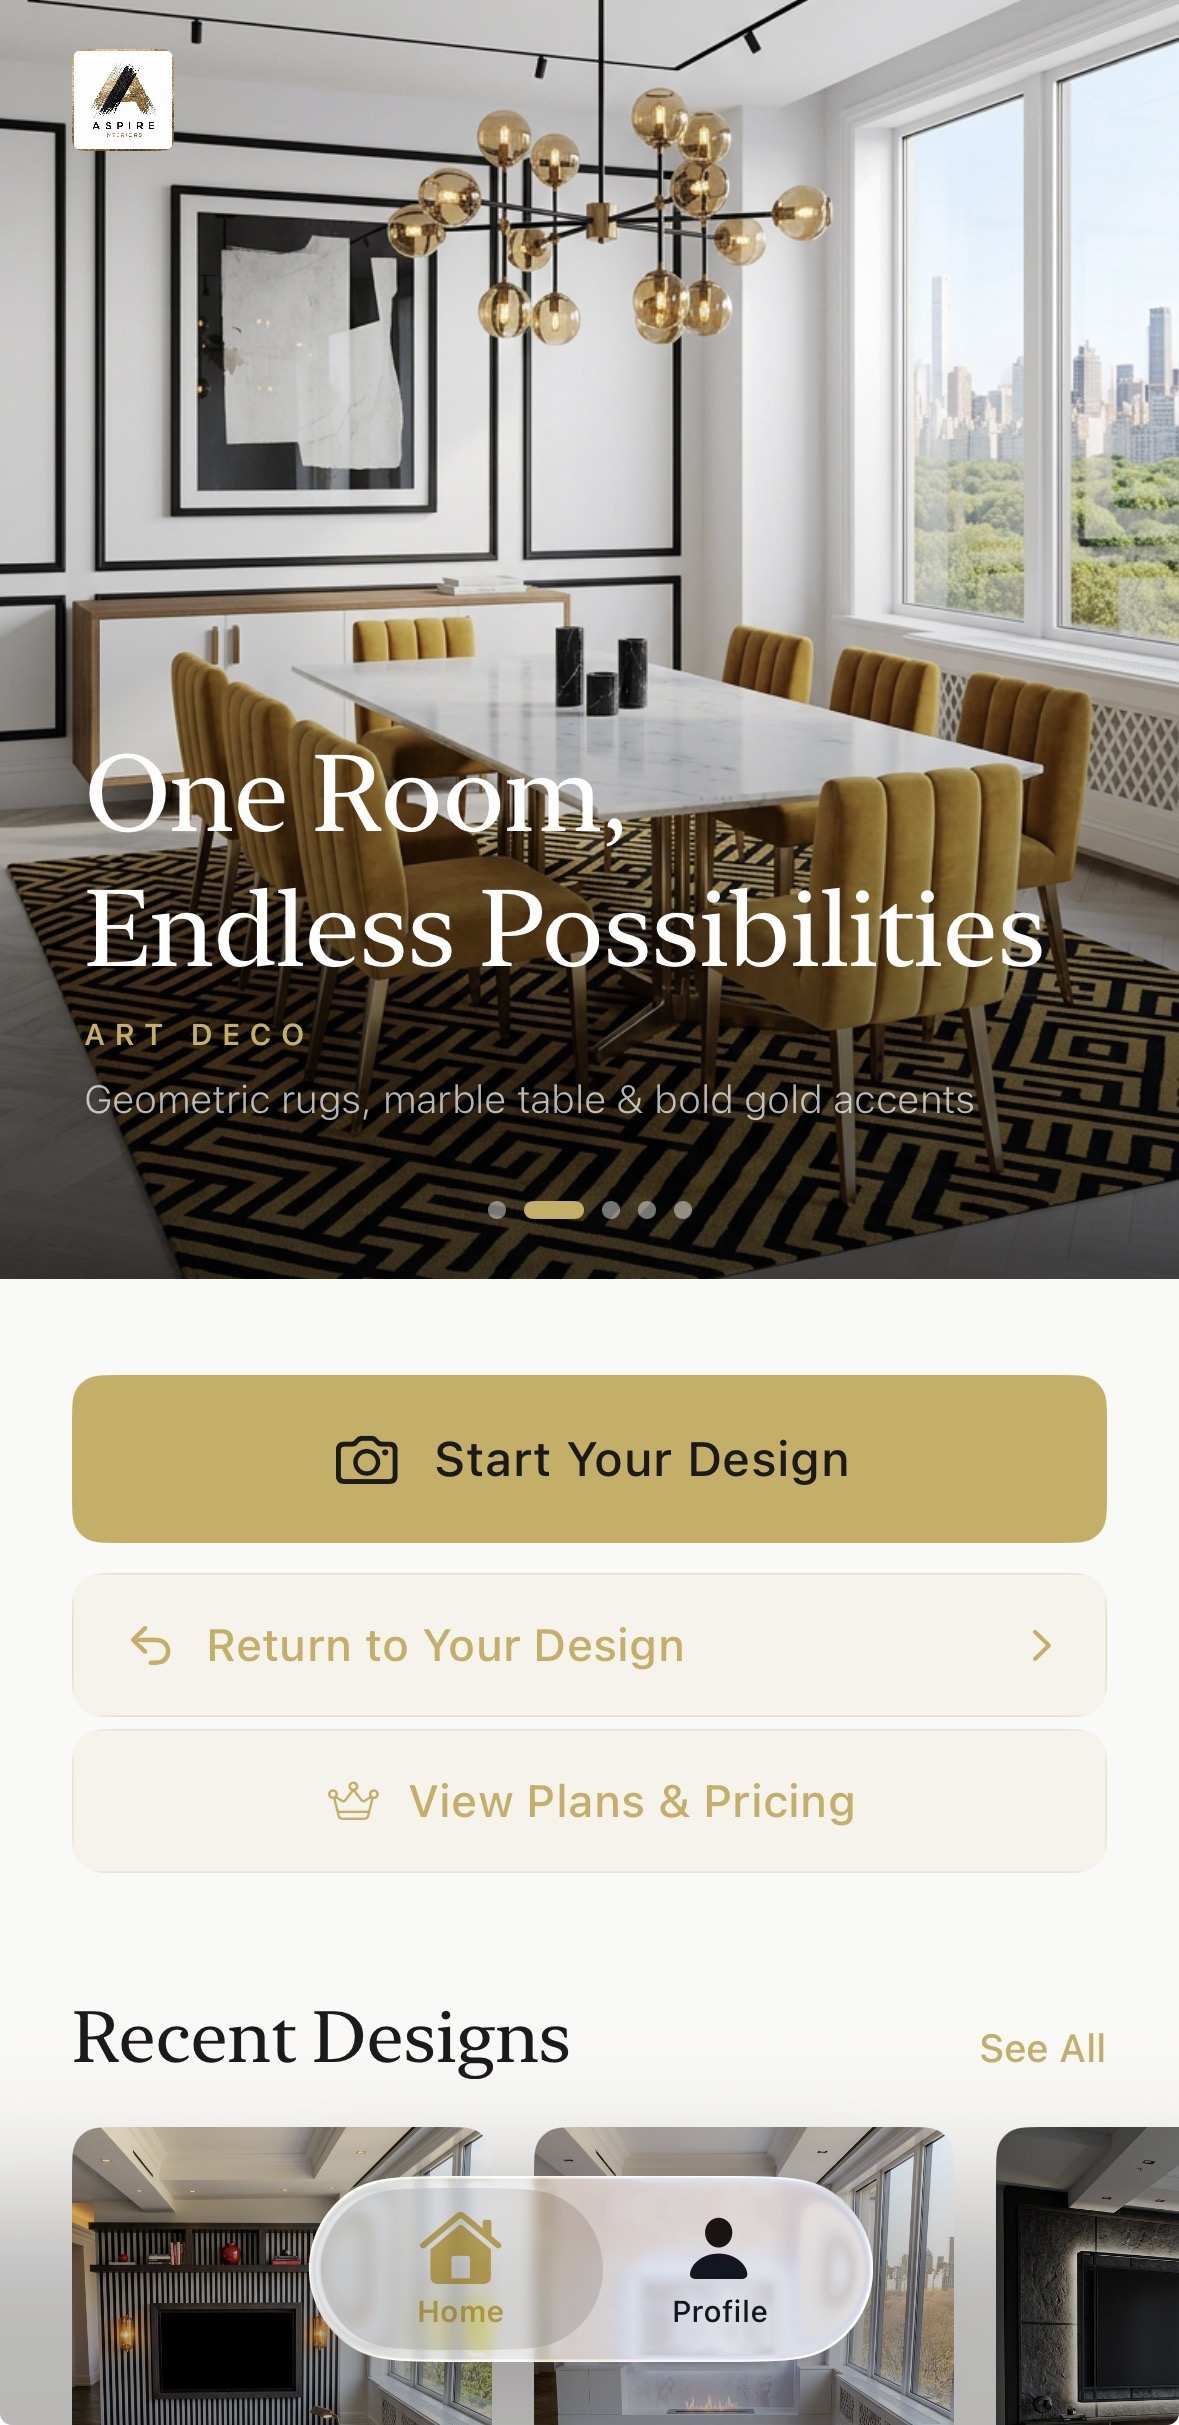
Open the App and Start Your Design
The first step is to open the Aspire Interiors app and start a new design. From the home screen, select the media wall route to focus the AI on your feature wall rather than a full room transformation. This keeps the project focused and gives you precise control over the wall, including materials, layout, and proportions.
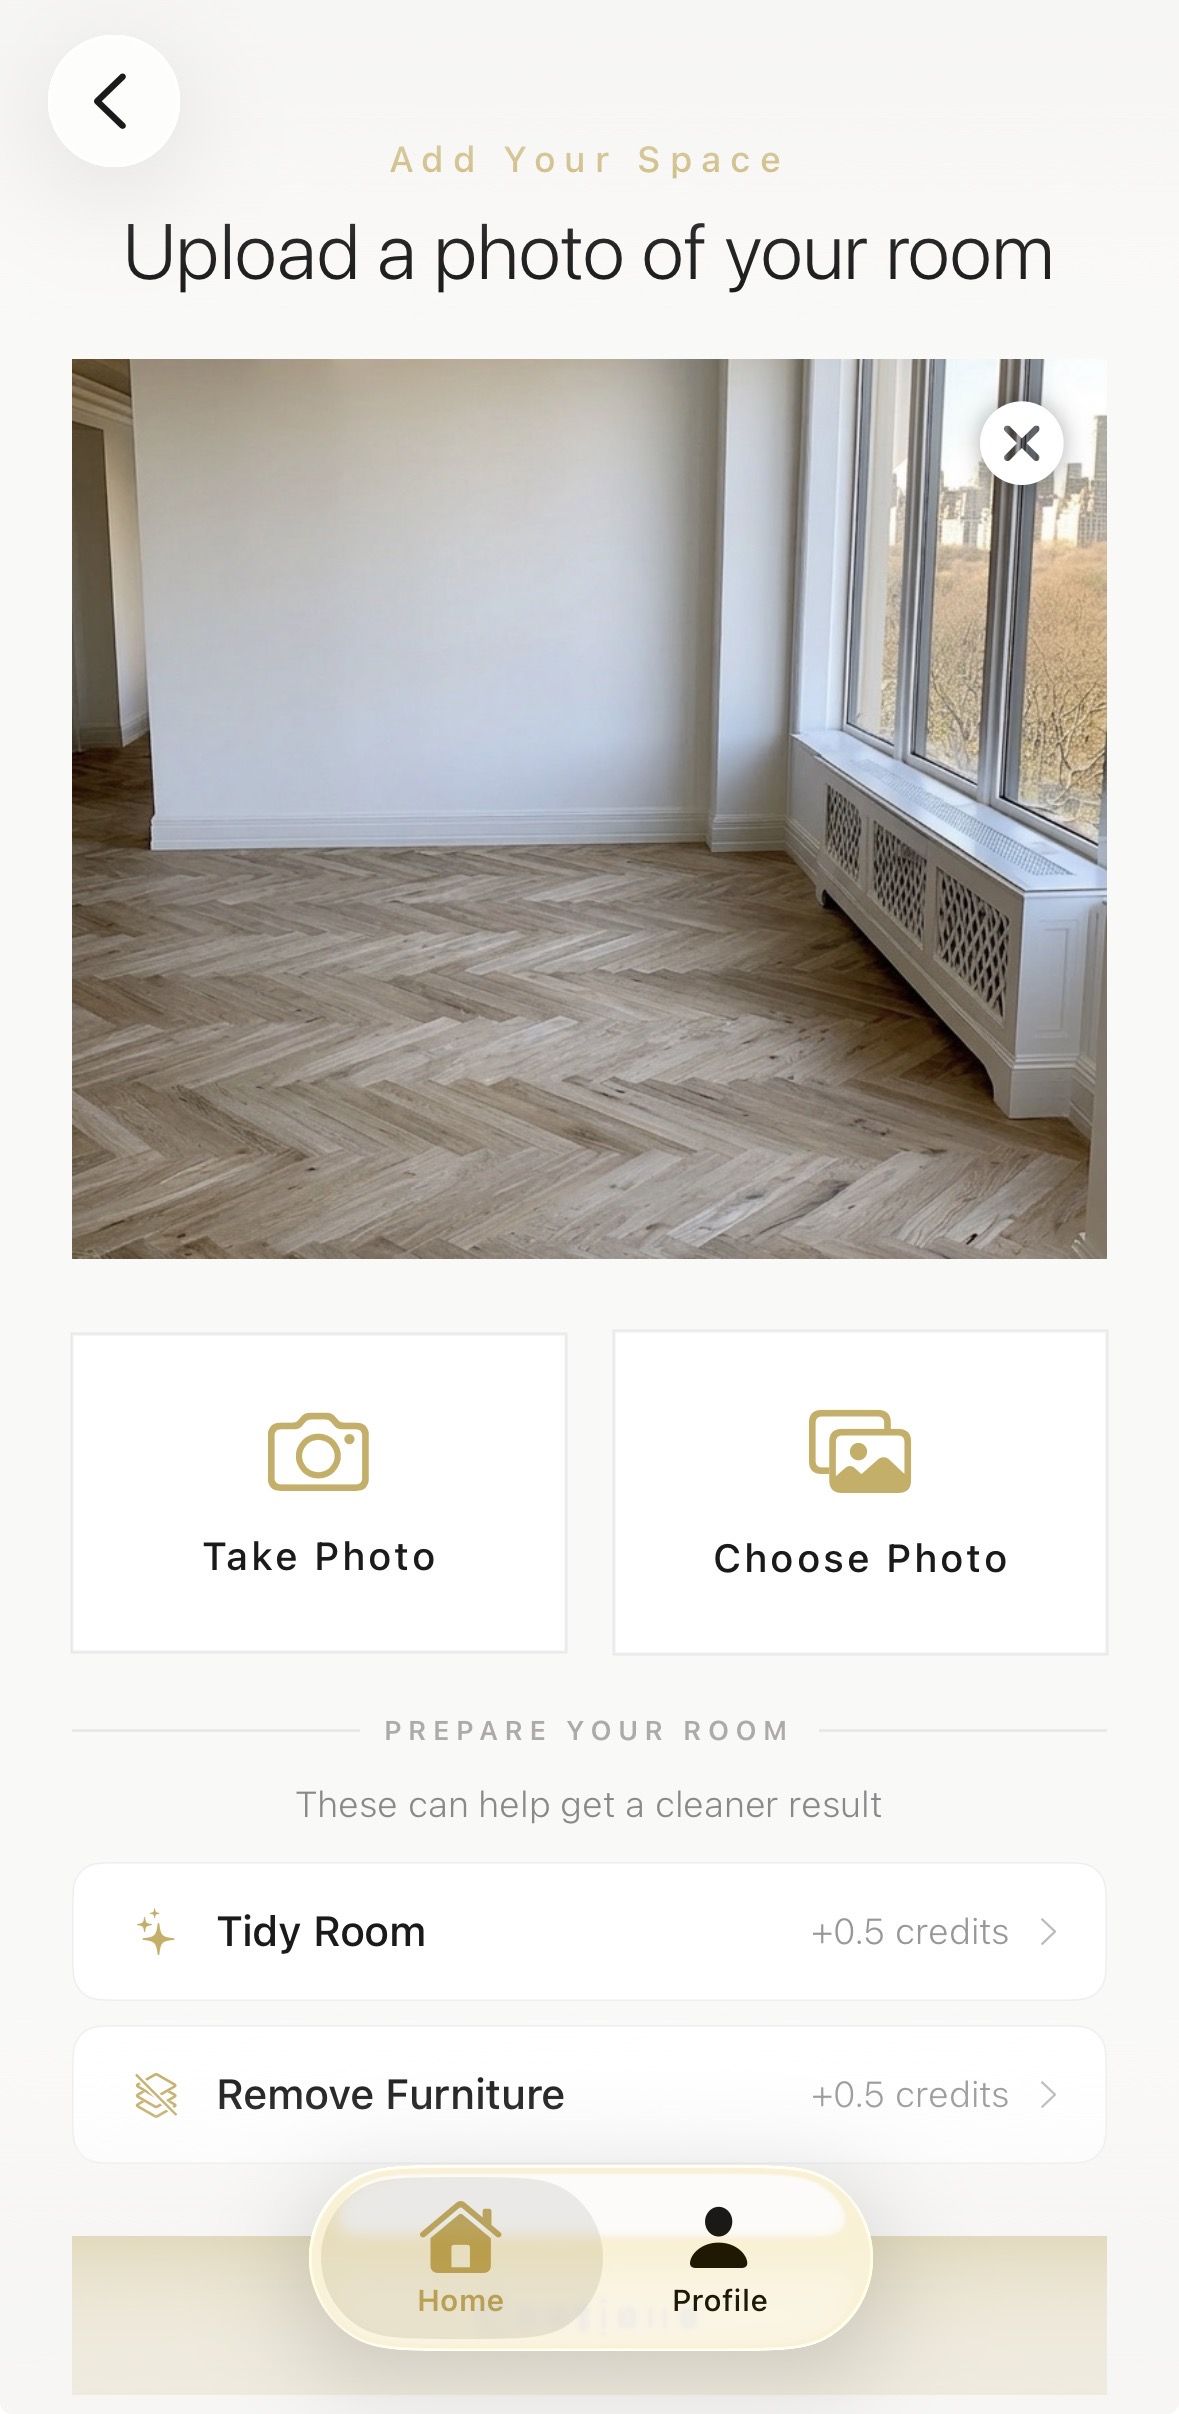
Take or Upload a Photo of Your Room
Next, the app asks for a photo of the room where your media wall will live. You can take a fresh photo with your phone or upload an existing image. The photo should show the full wall and the surrounding space, with the ceiling and floor visible if possible. The AI uses this image to understand the room proportions, ceiling height, and existing features.
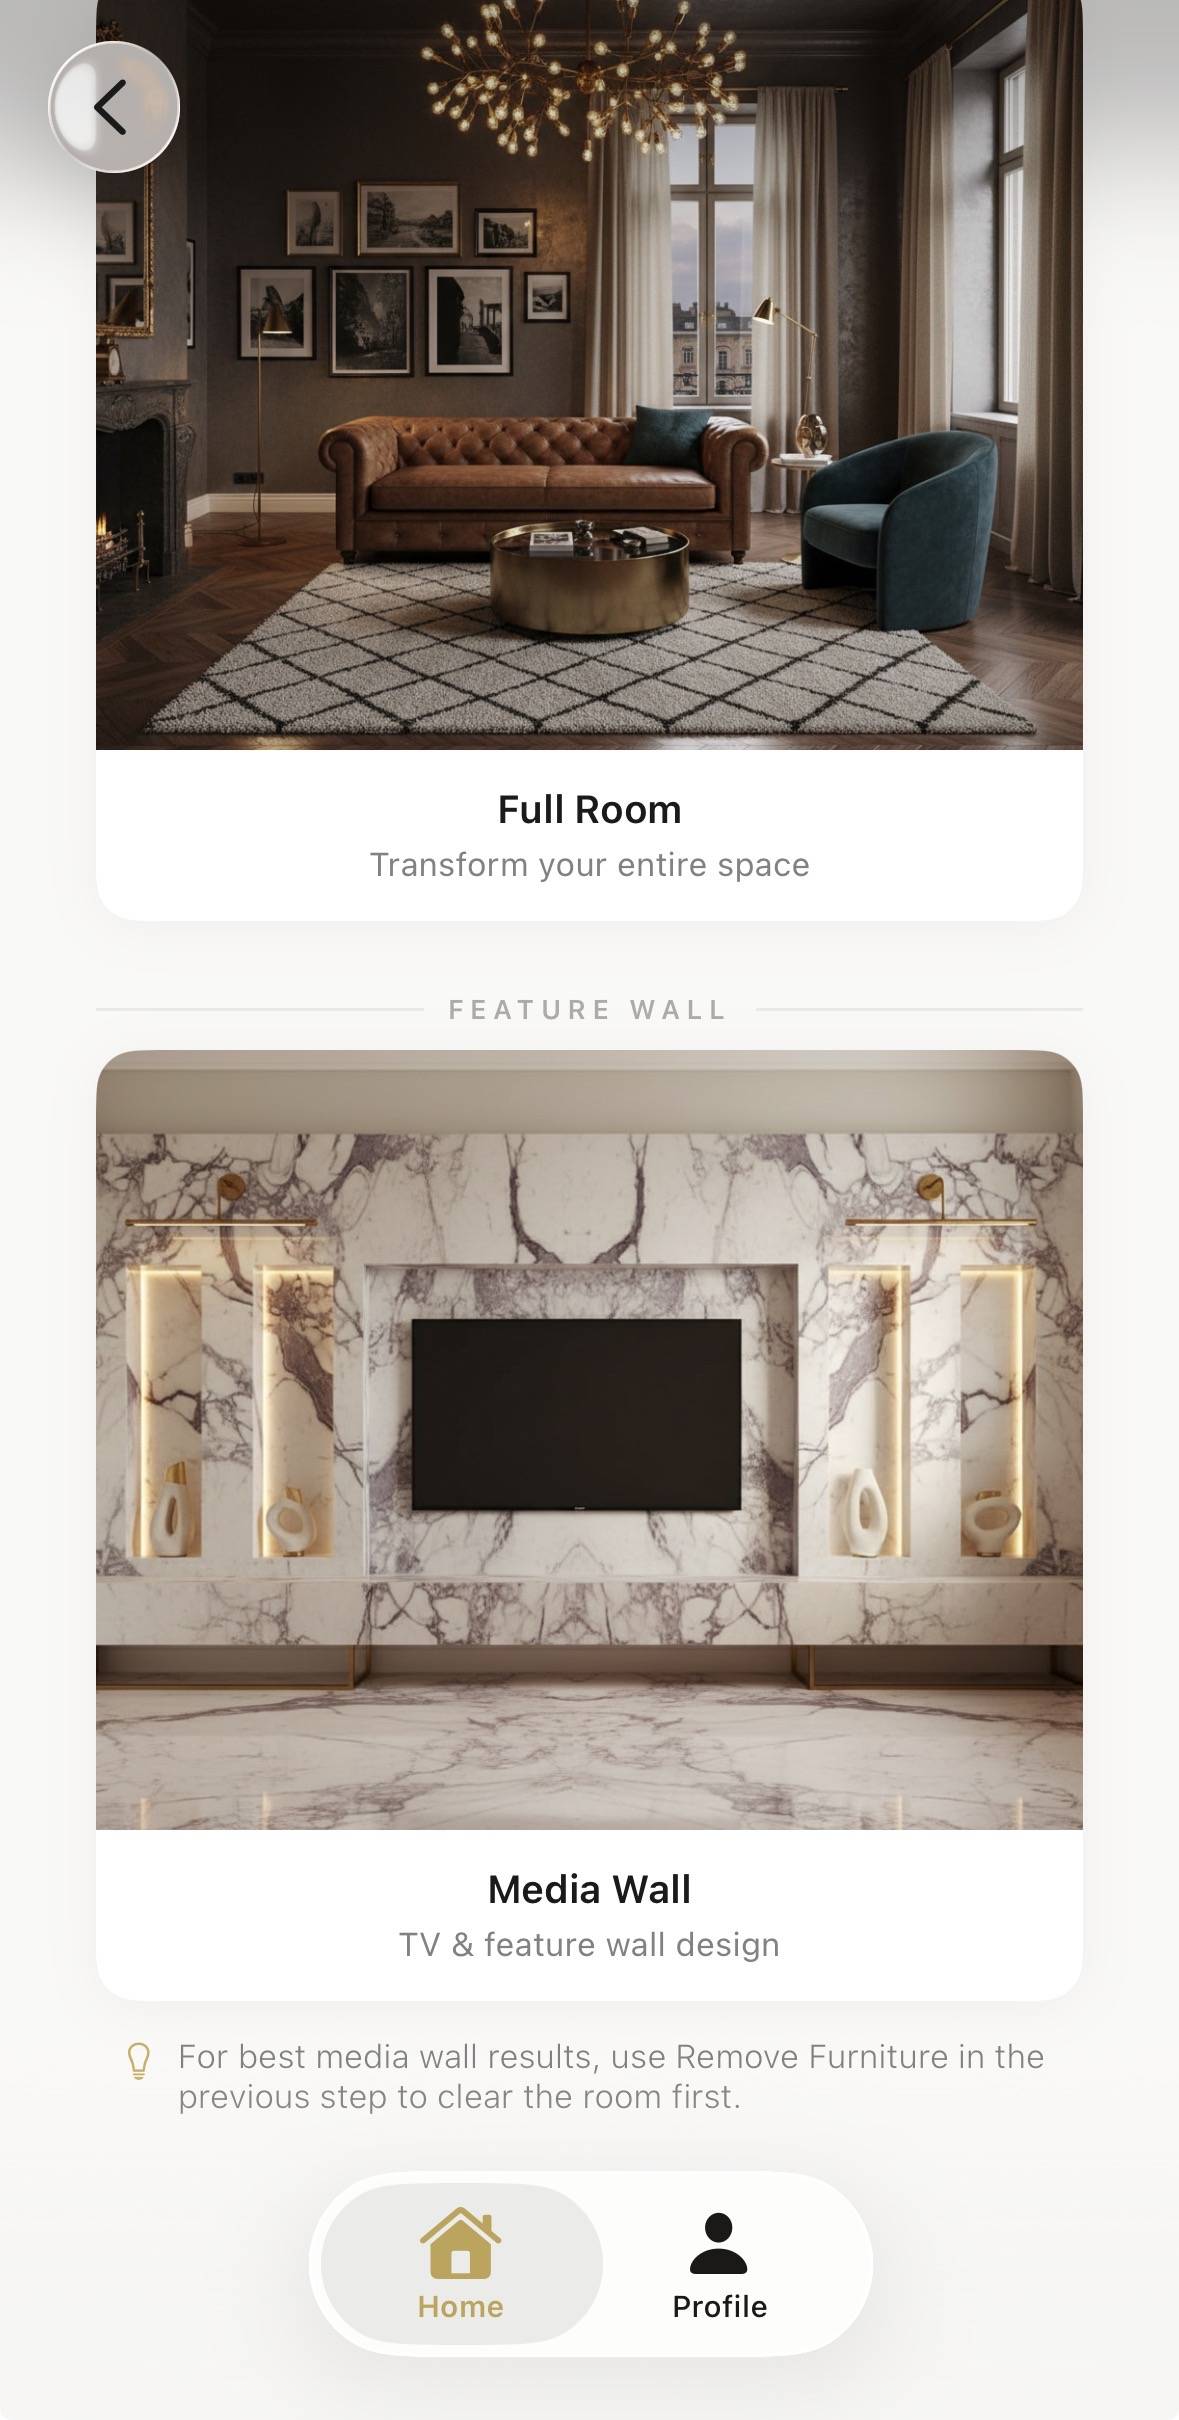
Select Media Wall (Not Full Room)
At this stage, choose the media wall option. This tells the AI to concentrate on the feature wall rather than replacing furniture, flooring, or décor throughout the room. It is the right choice if you already like the room but want to transform the wall that holds the television.
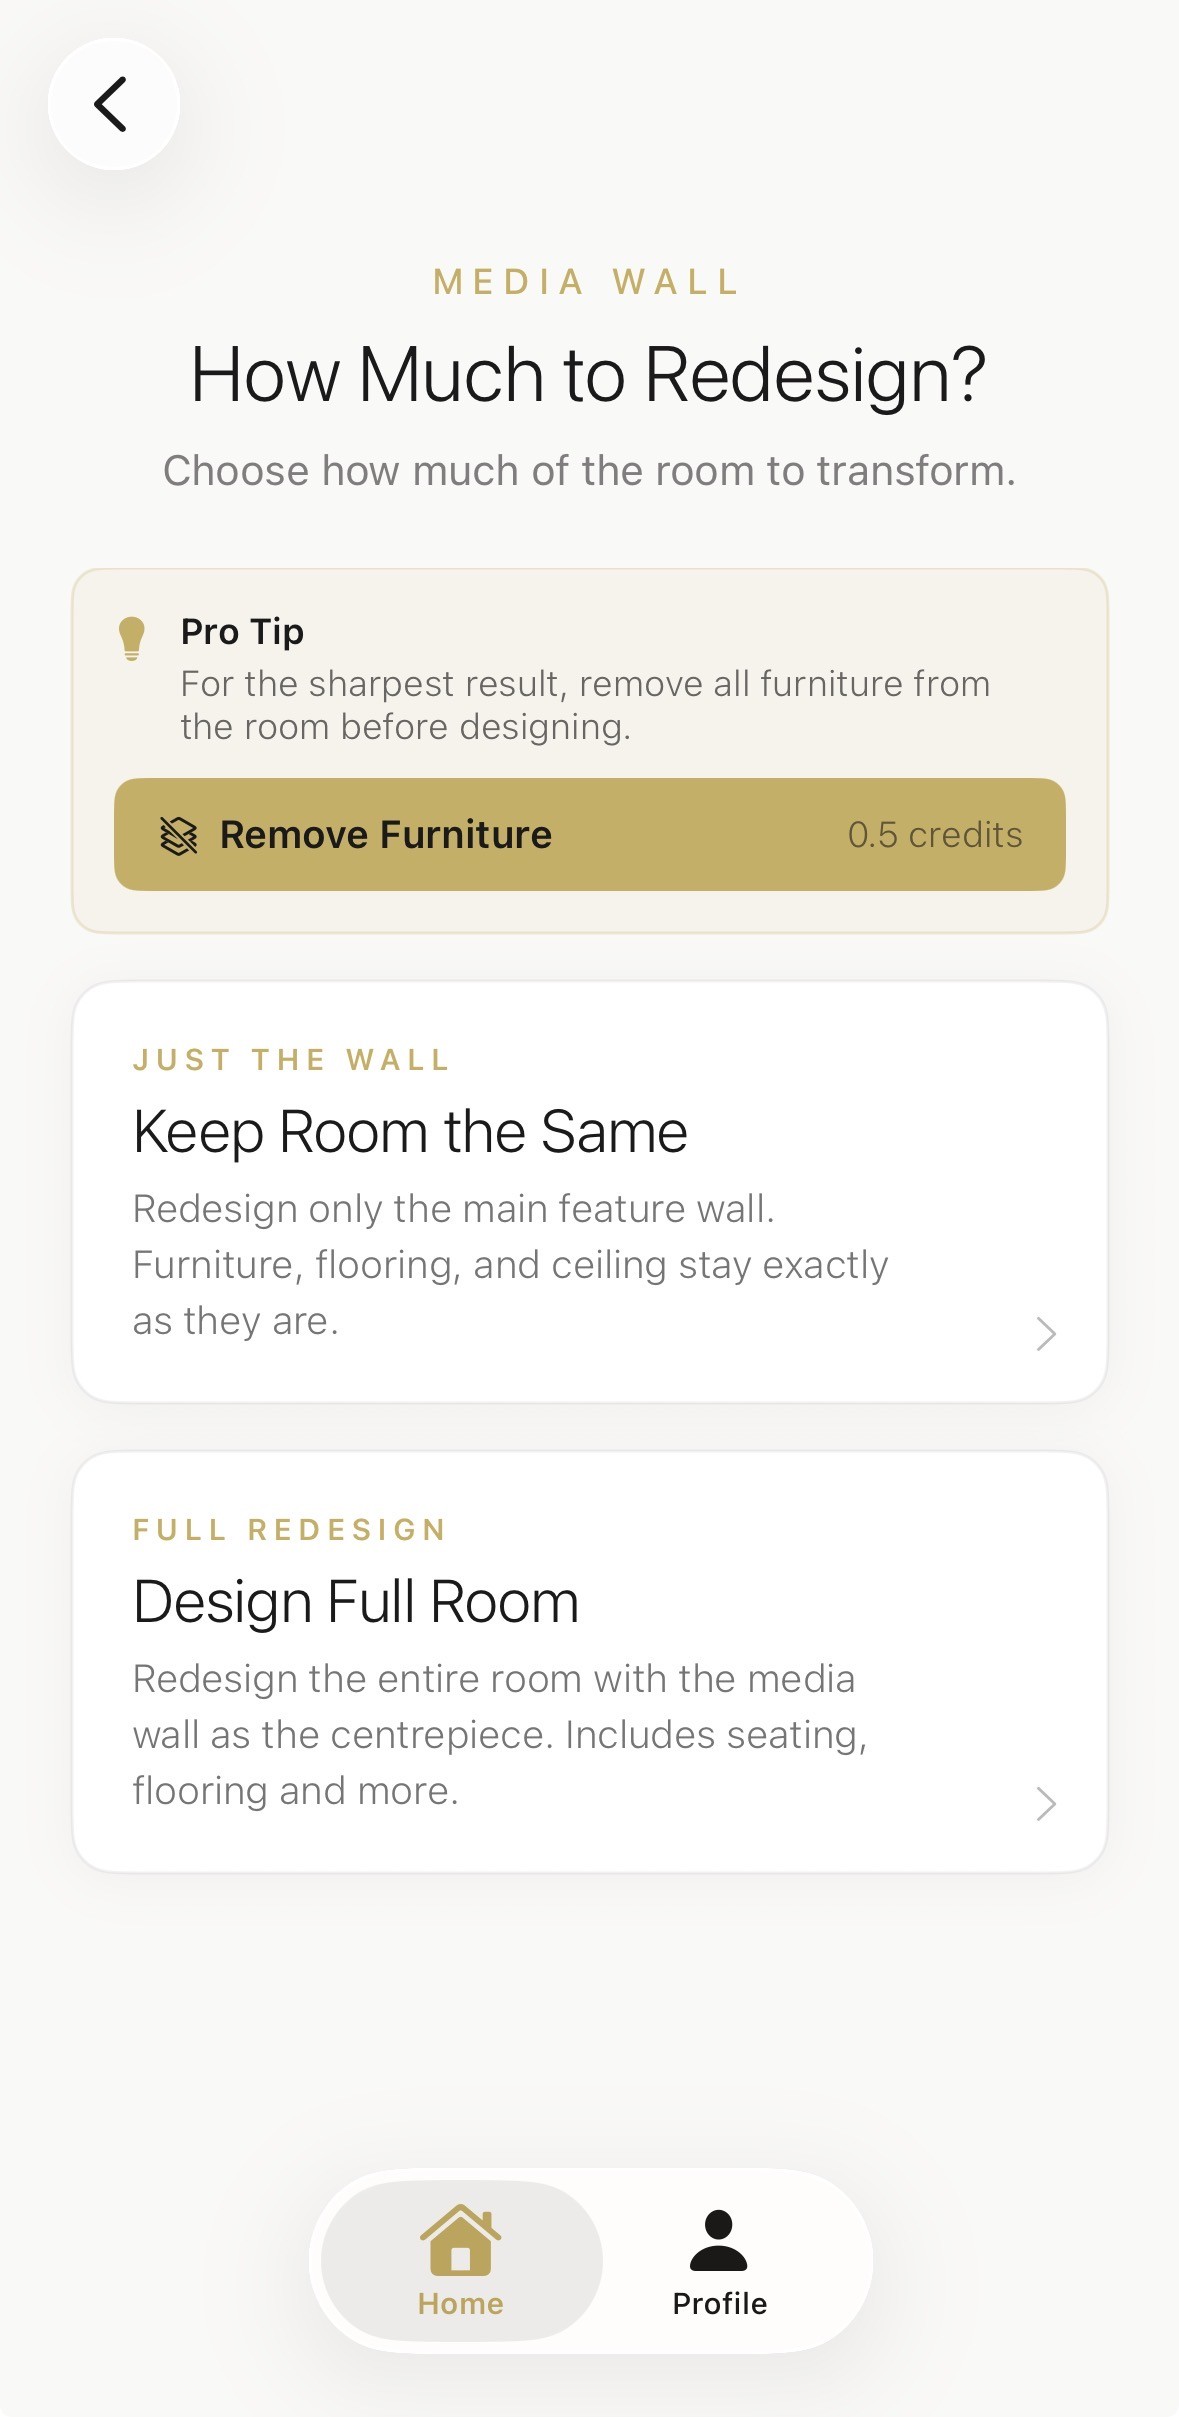
Choose Whether to Keep the Room or Redesign It
The app asks how much you want to change. For most users, keeping the room the same is the best starting point. It lets you see the media wall in the context of your actual furniture and flooring, which makes the result more realistic and easier to visualise.
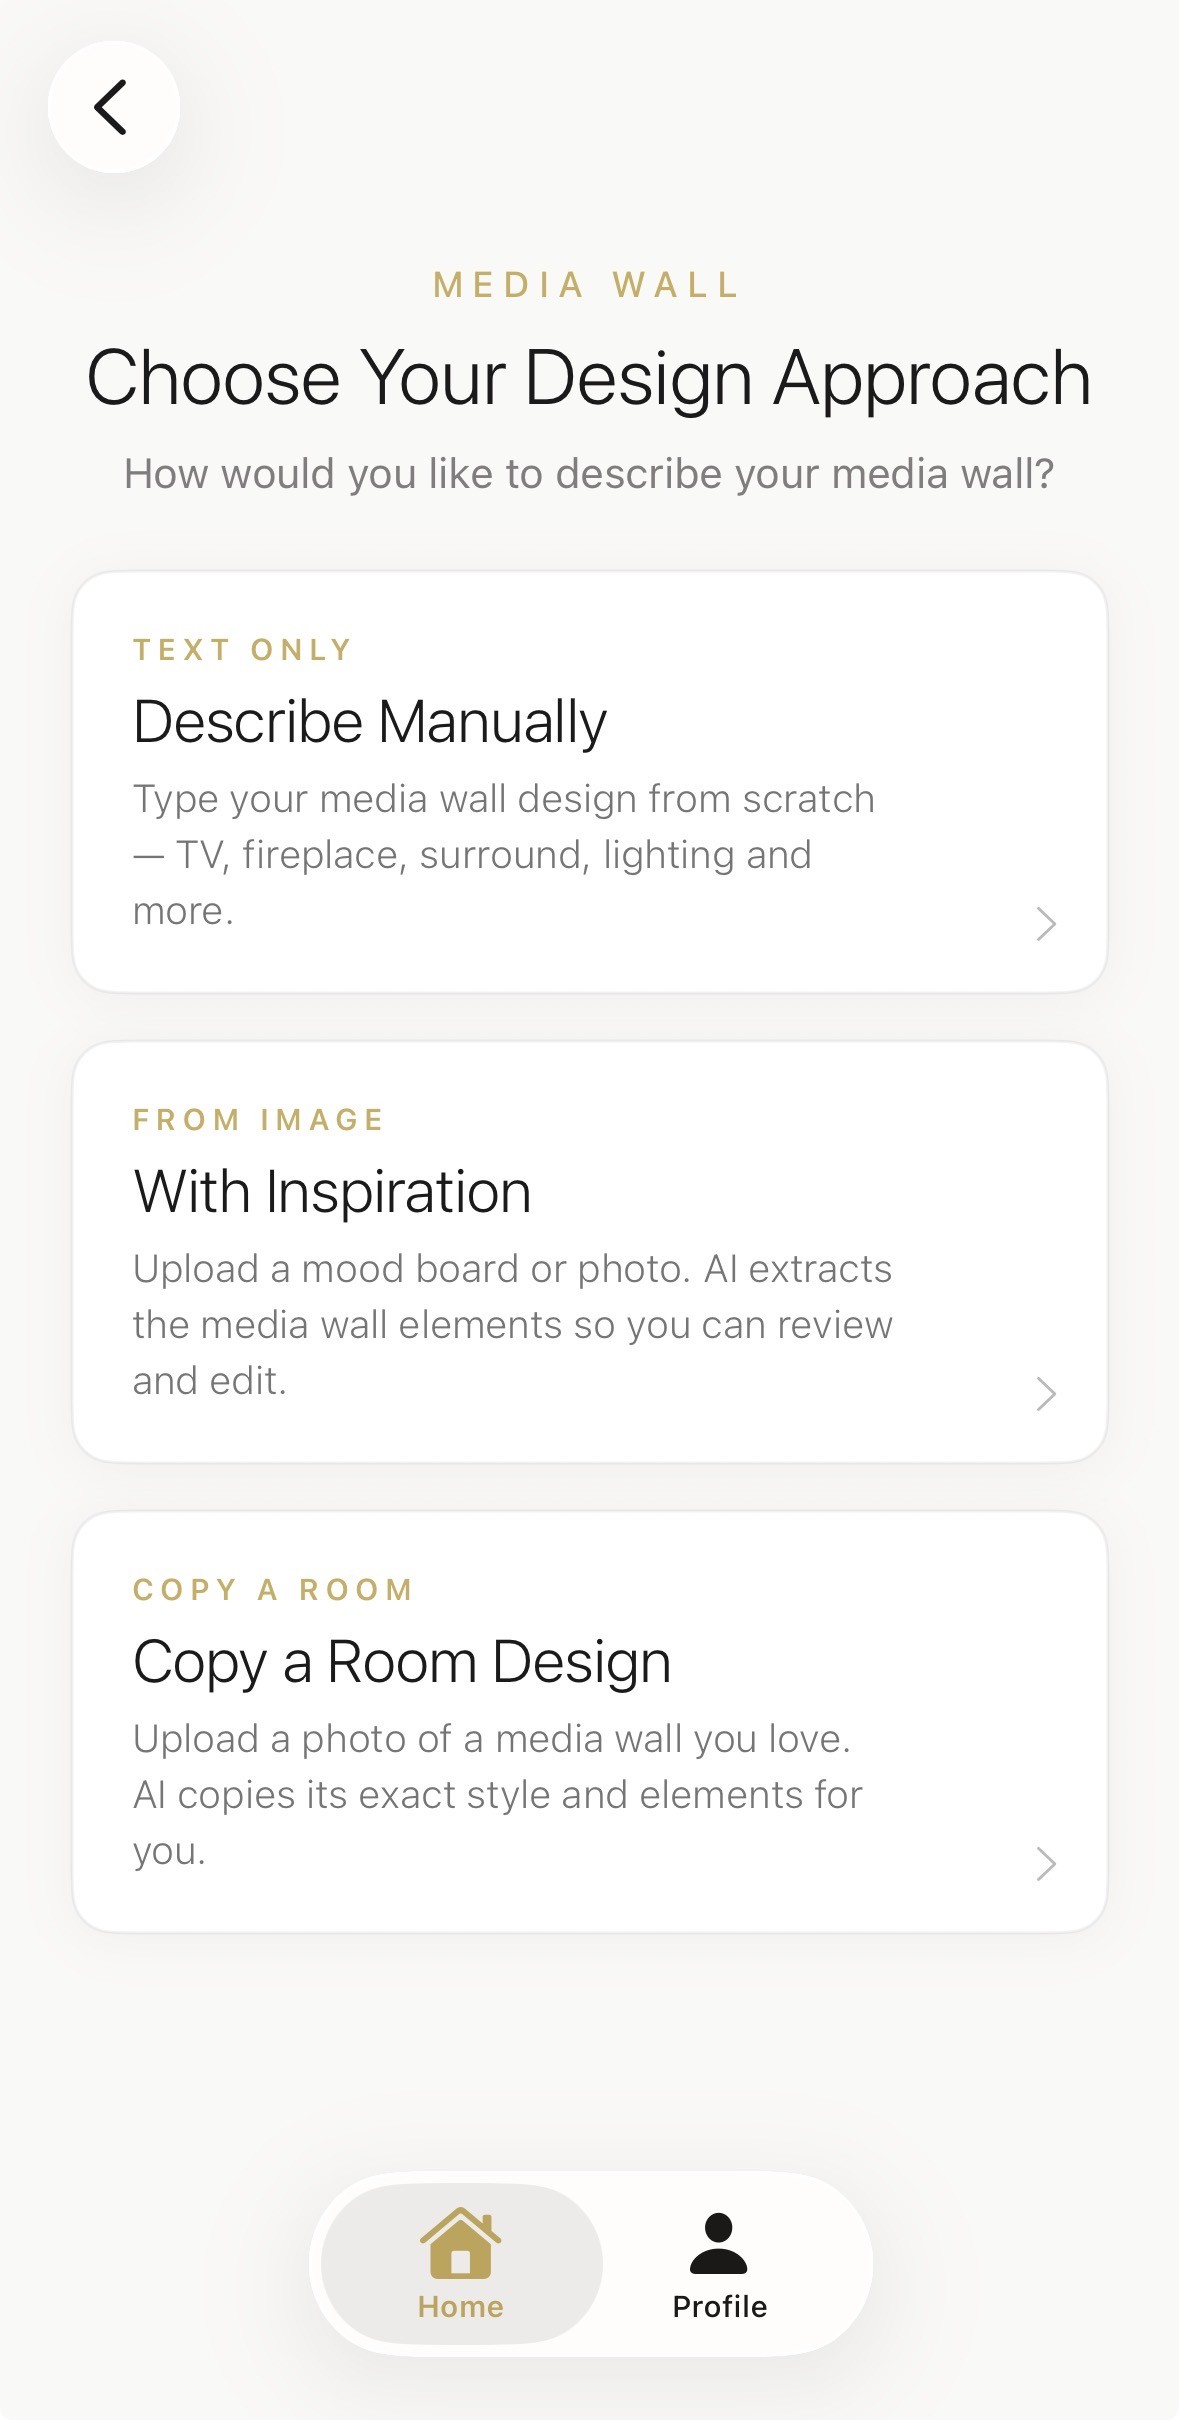
Choose to Upload an Inspiration Image
Choose the inspiration image option. This lets you point the AI towards a style, colour, or material you have seen and loved. It could be a photo from Instagram, a magazine screenshot, a hotel lobby, or even another room in your home. The AI will interpret the mood and translate it into a media wall concept that fits your room.
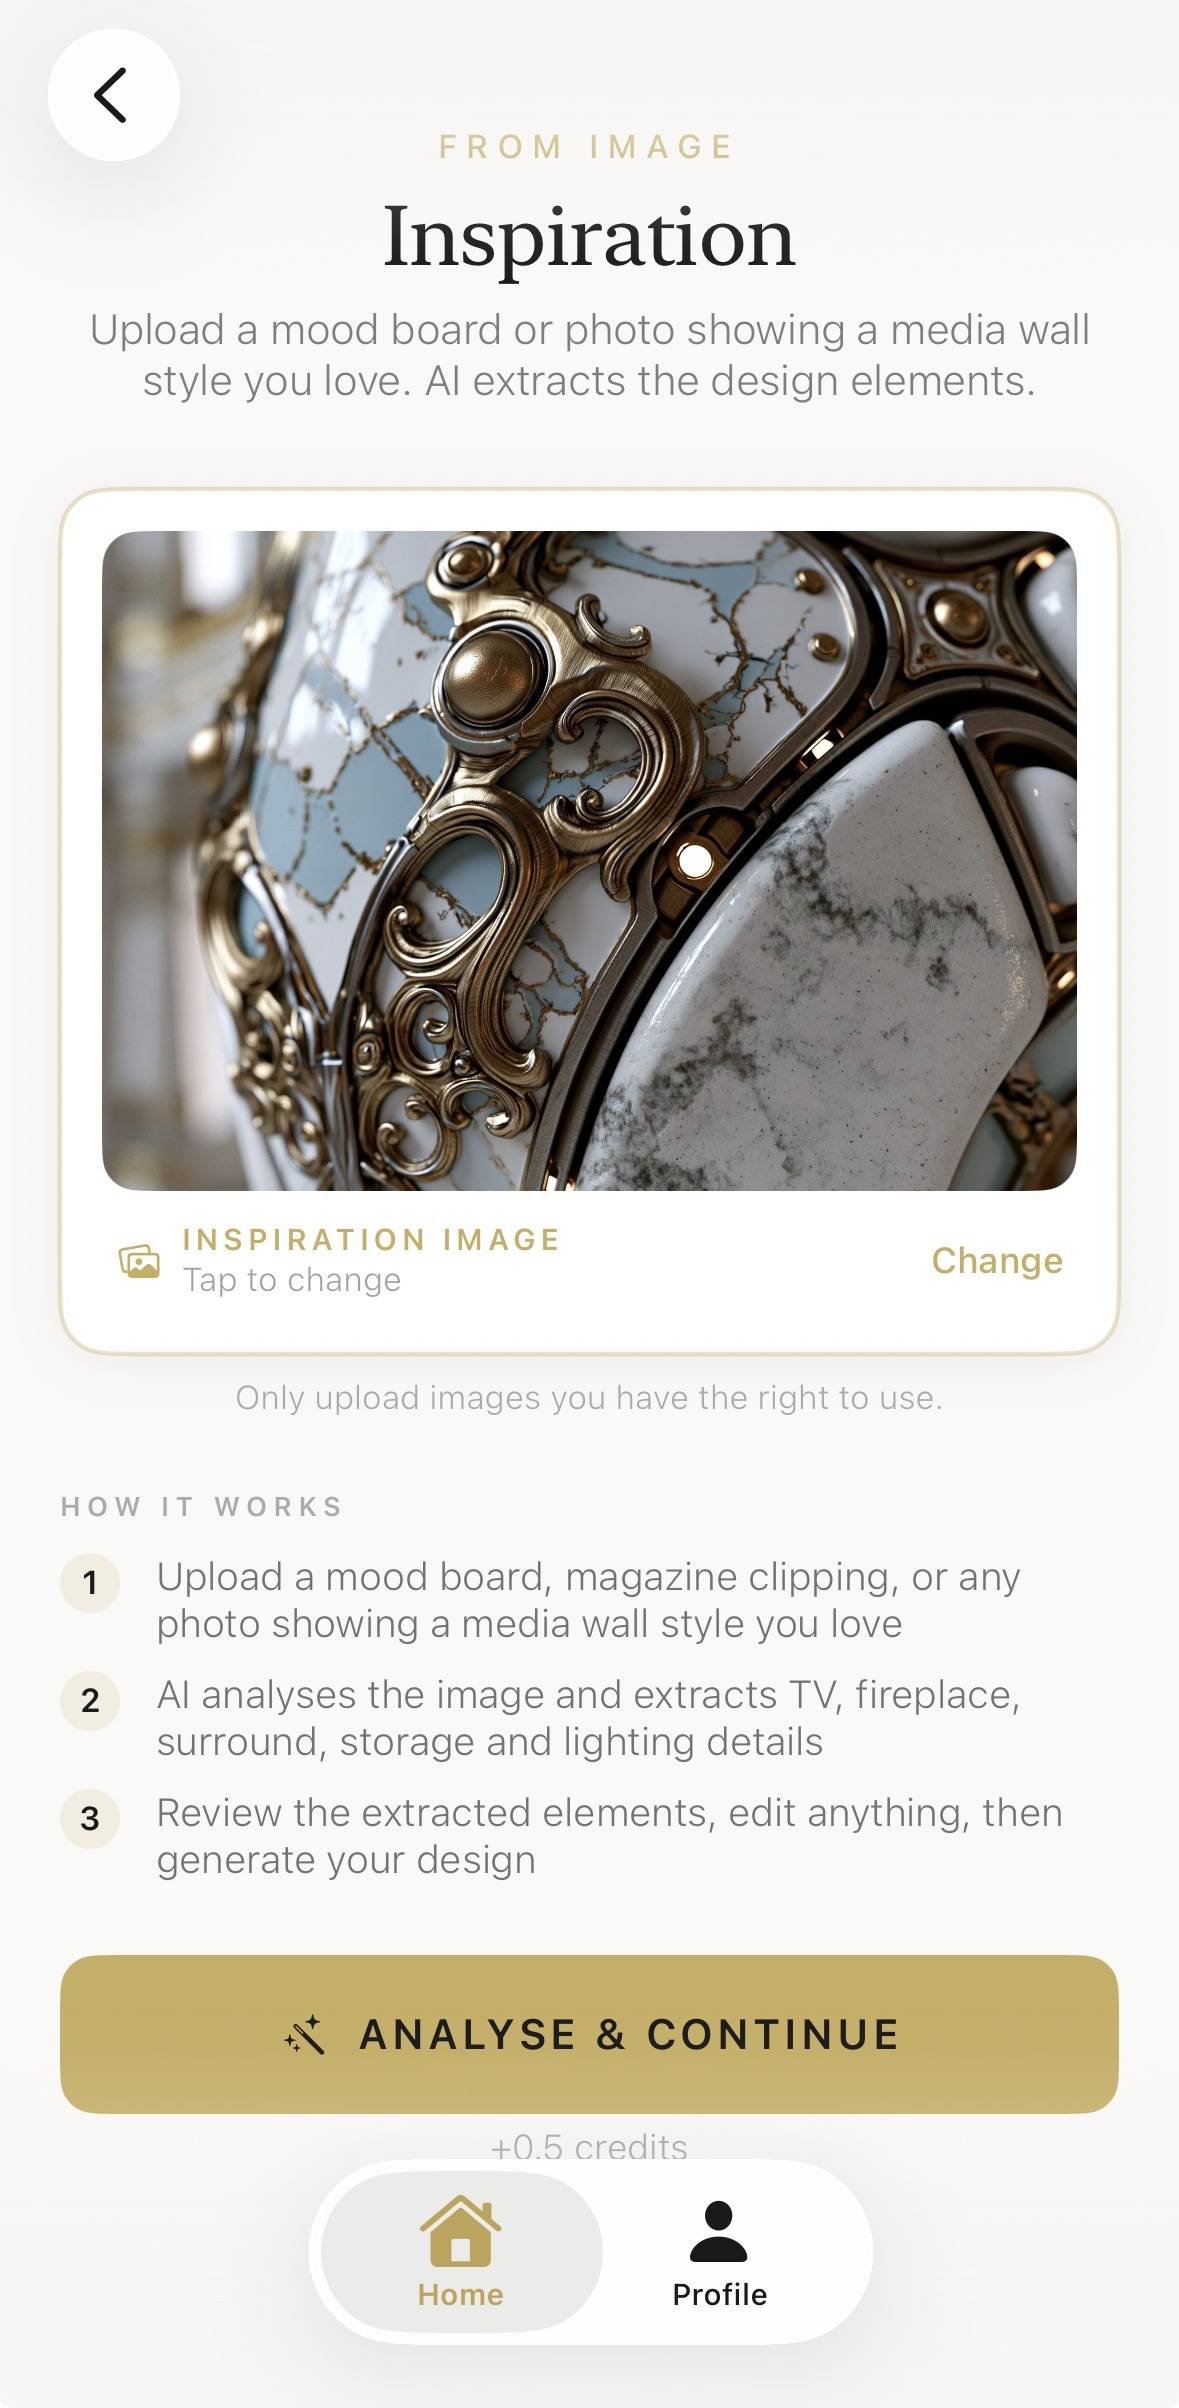
Upload Any Inspiration Photo
Upload the image you want to use as inspiration. It does not need to be a media wall. It could be a texture, a colour palette, a piece of furniture, or an architectural detail. The AI will interpret the mood, materials, and proportions of the image and translate them into a media wall concept for your room.
The AI Analyses the Image and Fills in the Design Brief
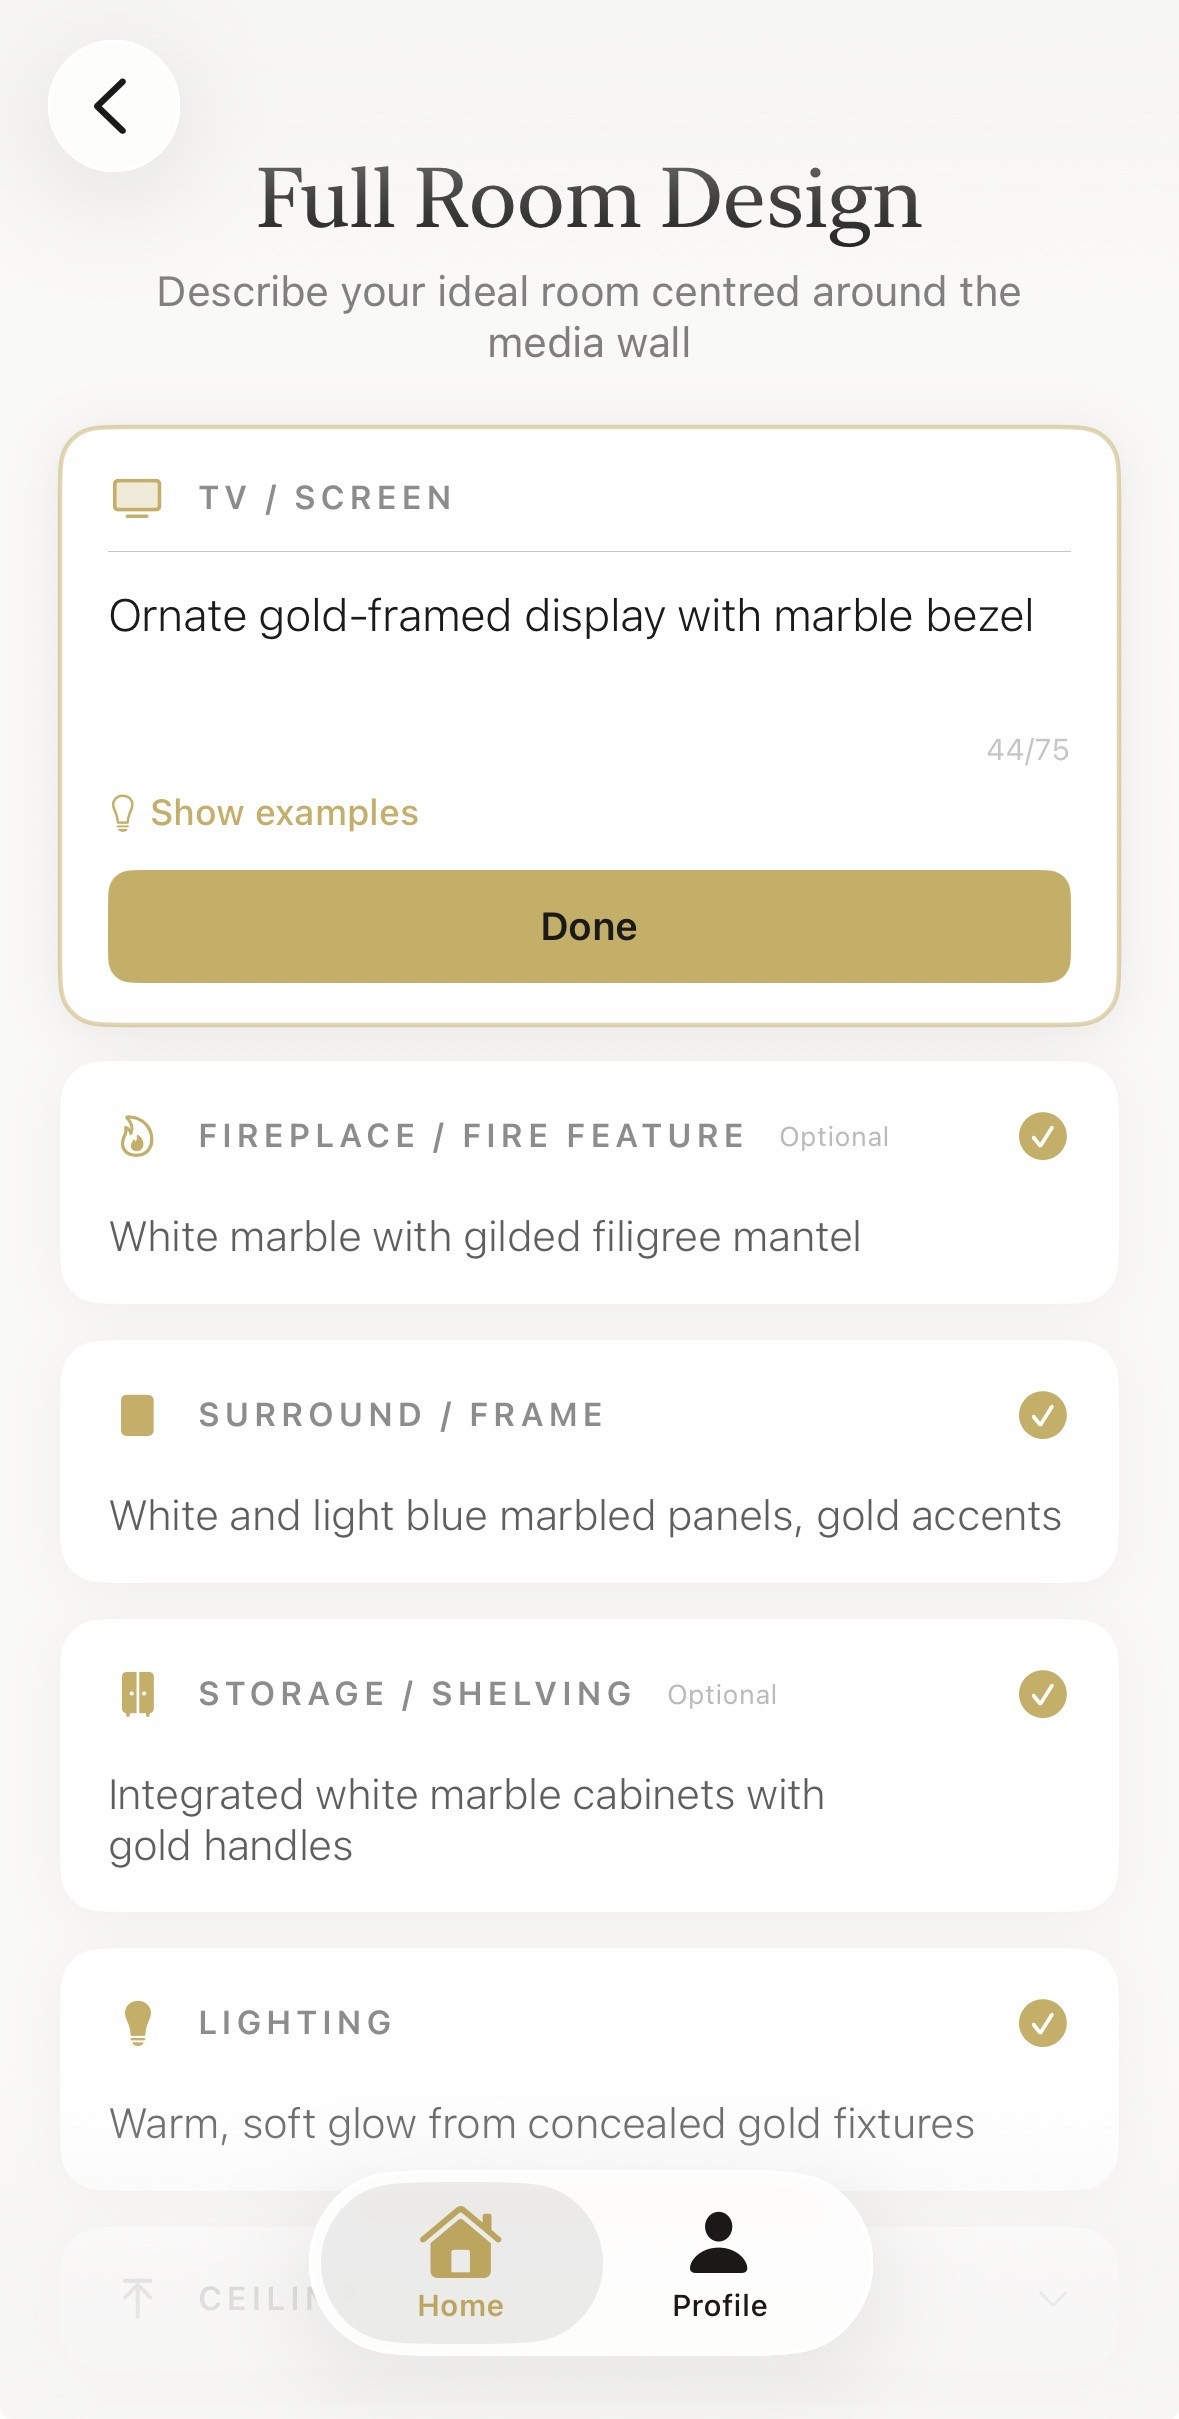
Once the inspiration photo is uploaded, the AI analyses it and automatically fills in the design brief. It suggests a style, materials, colours, lighting, and layout based on what it sees. Nothing is locked in. You can edit any field manually, change the description, add requirements, or adjust the tone. This is the heart of the process: the AI does the heavy lifting, but you remain in control.
What Happens After the AI Generates Your Design?
After the brief is set, the AI generates your media wall concept. You will see a visual of your new feature wall in your actual room, complete with materials, lighting, and proportions. This is the moment the idea becomes real. You can see how the wall will look from the same angle as your original photo.
From there, you can:
- Refine with text prompts. Ask for darker wood, a larger fireplace, more shelving, or a different colour. The AI understands natural language.
- Generate alternatives. Explore several directions from the same brief. You might want to see the same layout in marble, timber, or painted joinery.
- Compare options. See how different materials or styles look in your space before you commit.
- Save and share. Download the image to share with a builder, joiner, or interior designer. A clear visual brief makes every subsequent conversation easier.
The result is a clear, bespoke media wall concept that fits your room. If you would rather work from a mood board than a single inspiration photo, follow our guide on how to design a media wall with a full room mood board. For more inspiration, take a look at our AI media wall design ideas or our full room design gallery on the AI room design ideas page.
Ready to Try It on Your Room?
Upload a photo of your living room to the Aspire Interiors app and generate a bespoke media wall concept in minutes.
↓Start your AI designTips for the Best Results When Designing a Media Wall from a Photo
To get the most out of AI media wall design, a few simple habits help:
- Use a clear, well-lit photo. Shadows and blur make it harder for the AI to read the room.
- Show the whole wall. Include the ceiling, floor, and adjacent walls if possible.
- Pick inspiration that reflects your goal. The more specific the image, the more aligned the result.
- Start broad, then refine. Generate a concept first, then use text prompts to adjust the details.
- Think about function. Consider storage, lighting, cable management, and how the television is mounted.
- Be open to surprises. The AI may suggest materials or layouts you had not considered, and some of them may be better than your original idea.
Frequently Asked Questions
Can I really design a media wall from any photo?
Yes. You can use a photo of your own room or any inspiration image. The AI will use it to generate a bespoke media wall concept that fits your space and style.
How do I design a media wall with AI?
Open the Aspire Interiors app, upload a photo of your room, select media wall design, choose to upload an inspiration image, and let the AI generate a concept. You can then refine it with text prompts.
Is it free to design a media wall from a photo?
Aspire Interiors offers free credits to get started, so you can explore AI media wall designs without committing to a paid plan. You can generate several concepts before deciding whether to continue.
What if I do not like the AI-generated design?
You can edit any element. Change colours, materials, lighting, layout, or style with natural language prompts until the design feels right. The AI is there to help you iterate, not to dictate.
Will the media wall fit my actual room?
Yes. Because the design is generated from your room photo, the proportions and perspective are tailored to your space. The AI works with the dimensions and features it can see.
Where can I find more media wall inspiration?
Browse our AI media wall design ideas and AI room design ideas pages for more bespoke concepts and inspiration.
What kind of inspiration photo works best?
High-resolution images with clear lighting and a strong focal point work best. Architectural photos, interior design shots, and material close-ups all give the AI useful visual information.
Can I use a photo from Pinterest or Instagram?
Yes. You can upload any inspiration image, including screenshots from social media. Just make sure the image is clear enough for the AI to analyse the style, materials, and colours.
How accurate is the AI-generated media wall?
The AI produces a highly realistic concept based on your photo and brief. It is accurate enough for visual planning and decision-making, though you should still confirm measurements before construction.
Can I save and share my media wall design?
Yes. You can save your favourite designs within the app and share them with builders, interior designers, or family members to get feedback before committing.
Start Designing Your Media Wall from a Photo
Designing a media wall does not have to be complicated. With AI, you can go from a photo to a bespoke concept in minutes. You do not need templates, samples, or weeks of back-and-forth. You just need a photo and an idea.
↓Download on the App StoreOr explore more on the Media Wall Design page.
Related Reading
Published: 19 July 2026. By Mark Lunnemann — Founder, AutoMazen.ai. Built by AutoMazen.ai.